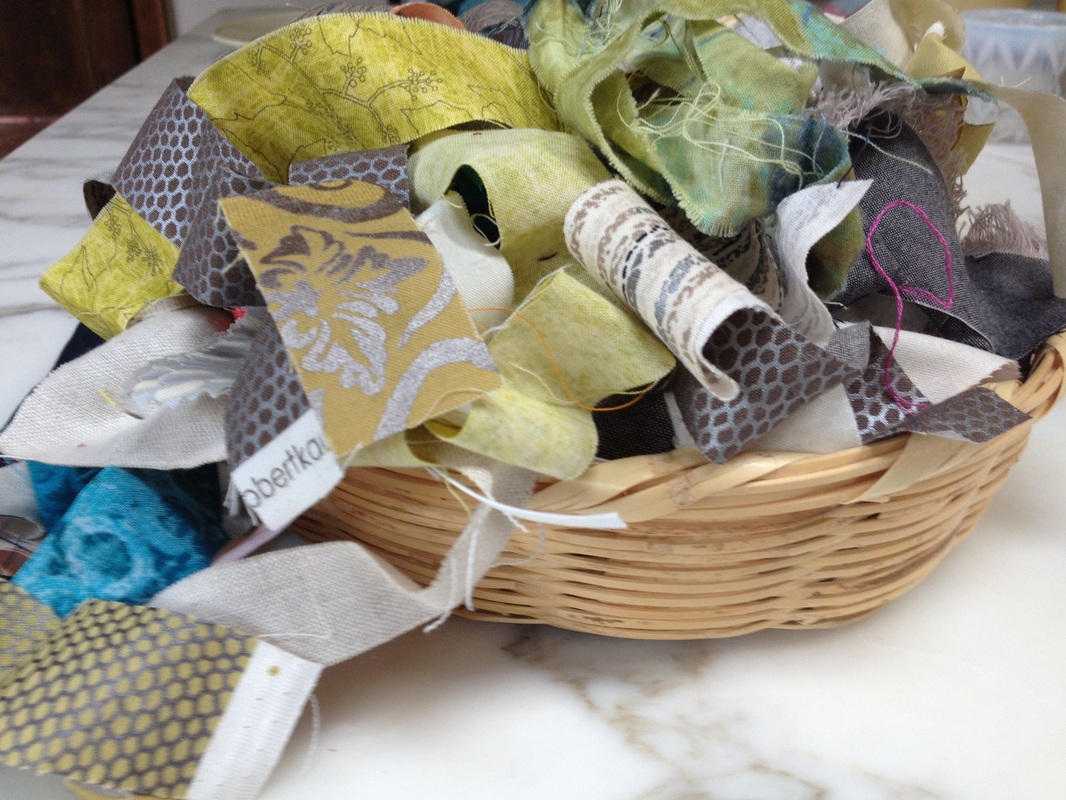
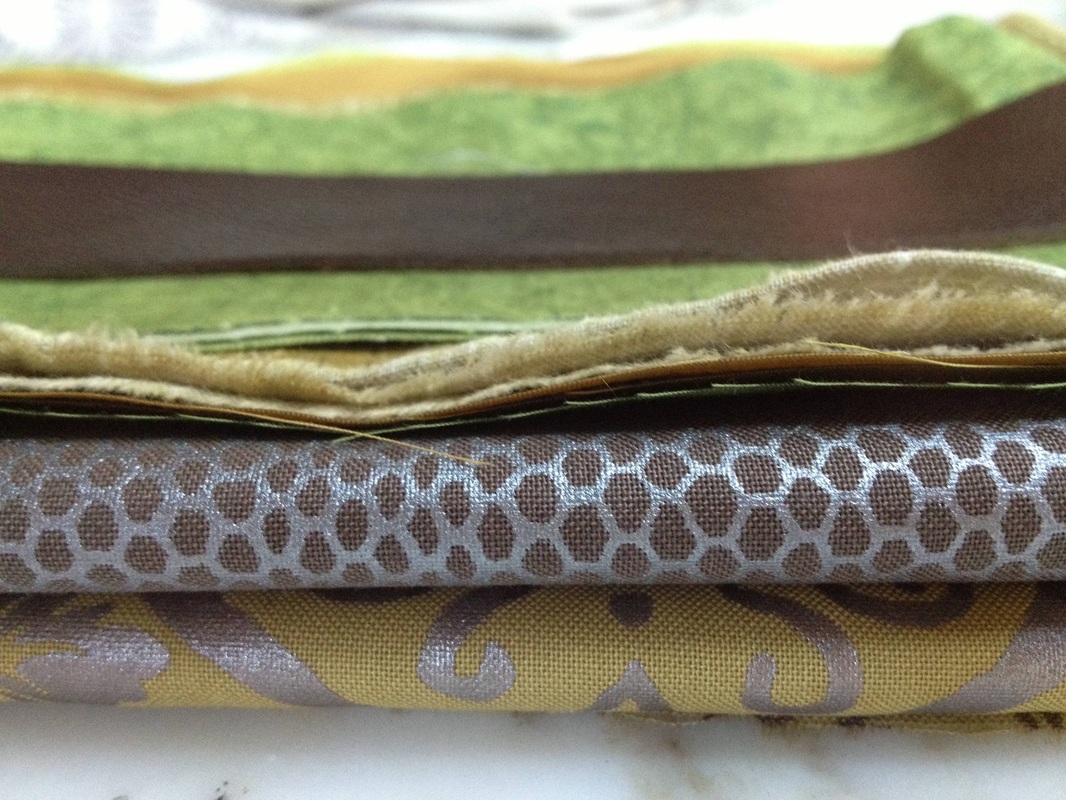
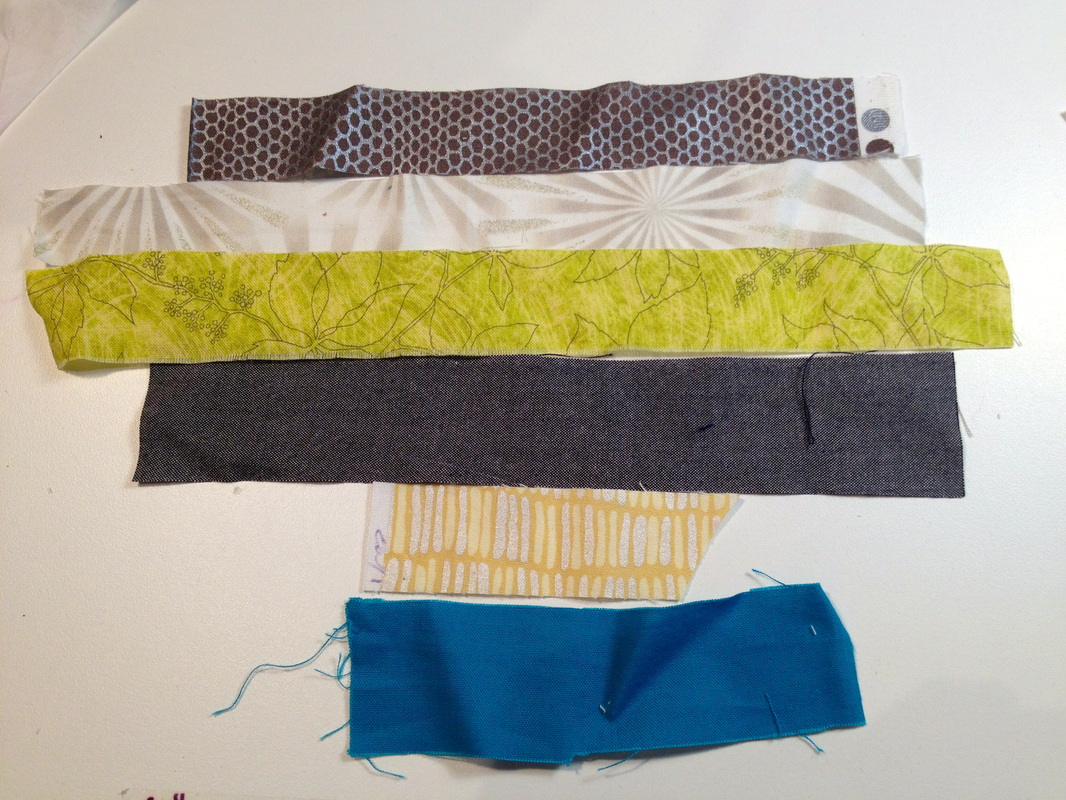
Scrappy Foundation Pieced Gemstone PillowSpider Web designs have caught my attention of late. Making a scrappy one out of Shimmer while adding a touch of turquoise appealed to me. I had lots of cut up scraps from the projects we were making already for the lookbook so I started to play…which is what I love best. Foundation piecing by stitch and flip is so fun. I don't even care if my seams aren't 1/4". Pillows are quick and rewarding and this process is freeing! 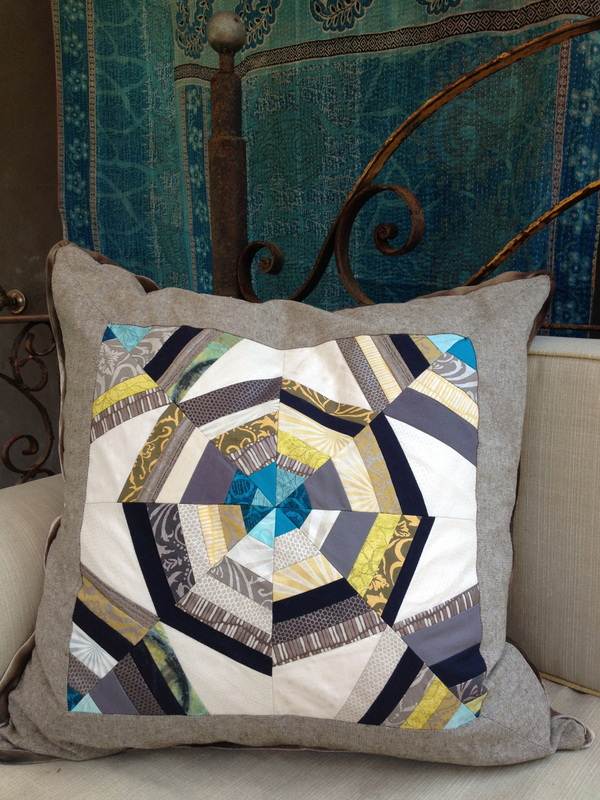 The antique quilt below is a gem from Roderick Kiracofe's collection which is so wonky, fresh and full of movement that I used it as inspiration for my approach. Interestingly enough, this quilt dates from 1940-70 made in Hard Bargain, an African American community in Franklin Tennessee. In addition to the 20-30 strips of Shimmer Fabric I had on hand, I added strips of black and charcoal Kona cotton and 5 shades of turquoise with a few pops of lime.
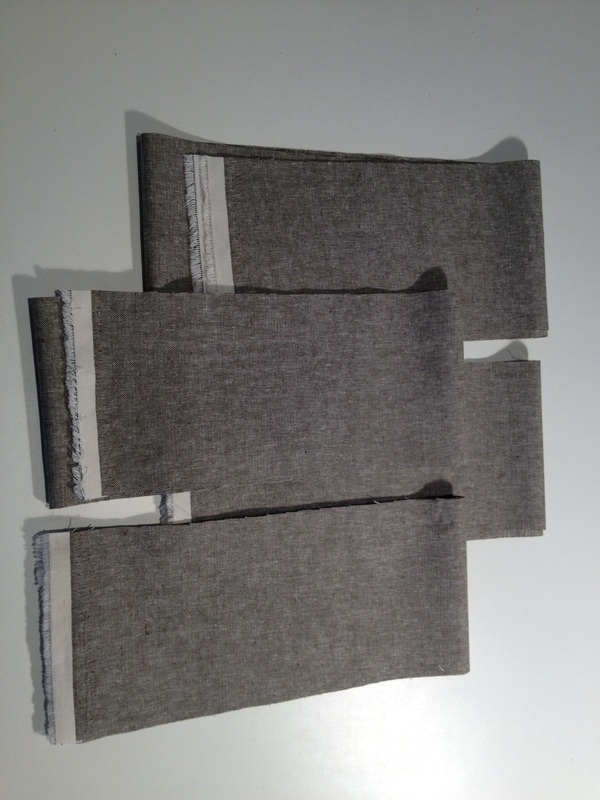
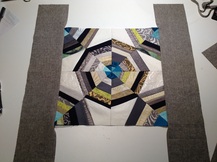
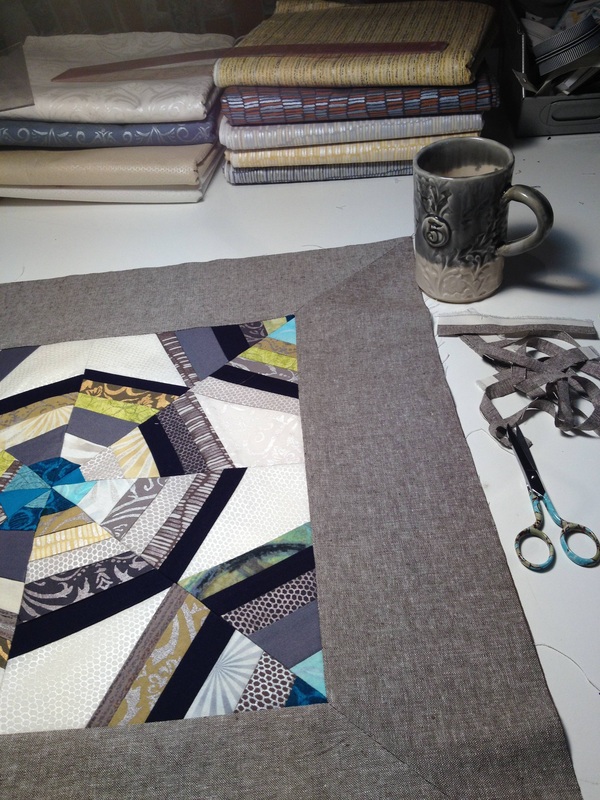
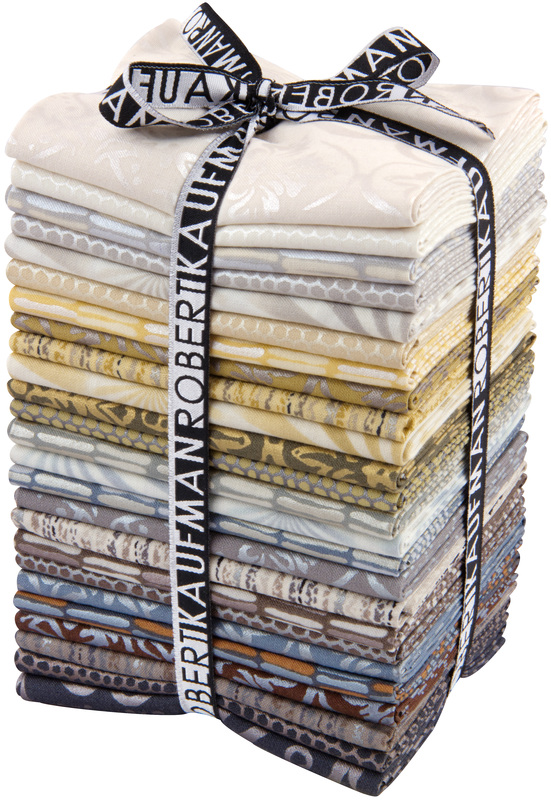
Beginner / Intermediate Project. Great way to use up your scraps! Finished pillow 23 x 23 (all measurements are in inches, 1/4 seam allowances) Materials List : • 1 yard total of 1" - 3" width x 1" - 6" length of strips in Shimmer, lime and turquoise prints. Kona black, charcoal and turquoise • 2 Fat Quarters of Shimmer AJSP 14250-15 Ivory, 14249-15 Ivory • Borders- 3/4 yard of Essex Y/D Linen in Olive • Pillow form 24" x 24" • Foundation Paper such as Carol Doak's Foundation Paper • Velvet Trim- 3 yards of 2 1/2" strips Artemis moon dust • Backing- 3/4 yard or 24" square of your favorite Shimmer print • Nylon zipper beige 22" *** SHIMMER has been wildly popular and many shops were backordered. Please know it's been reprinted and many shops have fresh stock now! (Hawthorne Thread, Cotton Patch, Fabric Depot, Fabric.com, Cabbage Rose ) If you are a store and also have collection stocked yet not listed here, please let me know.
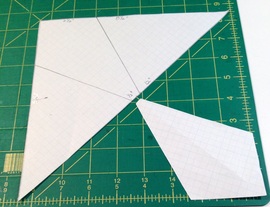
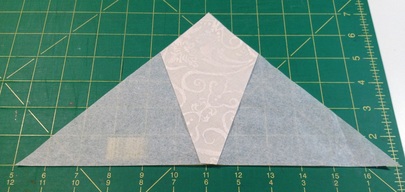
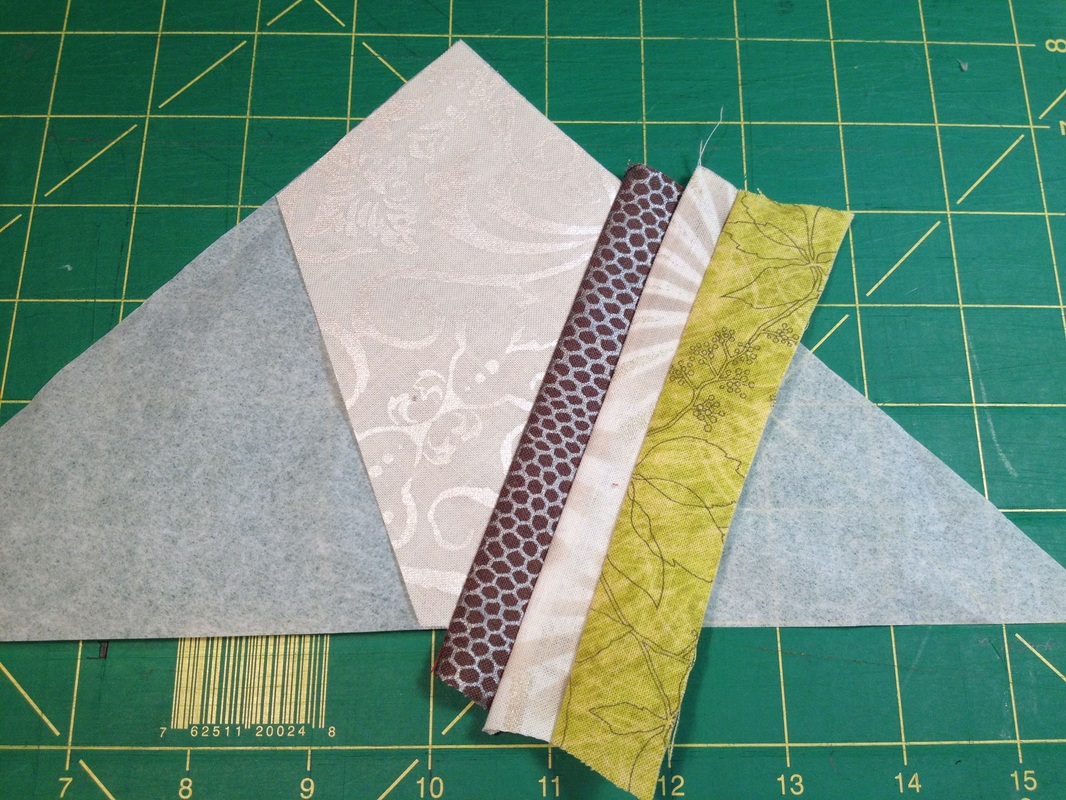
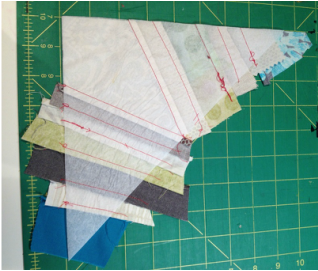
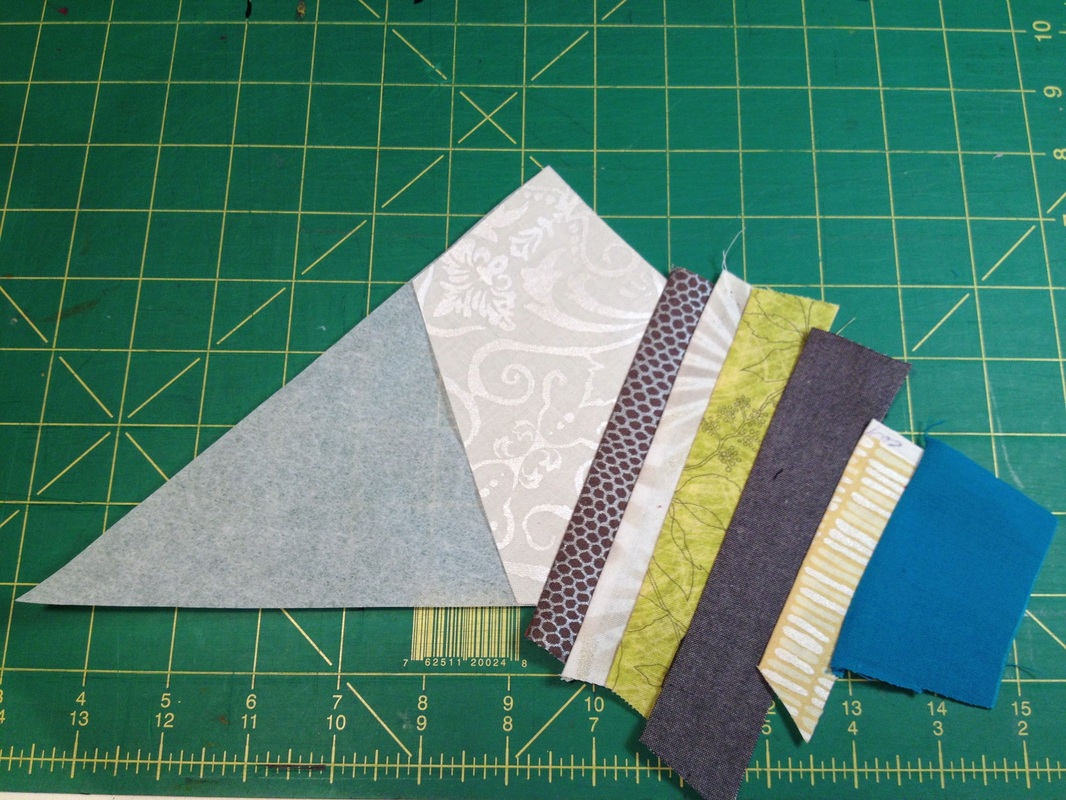
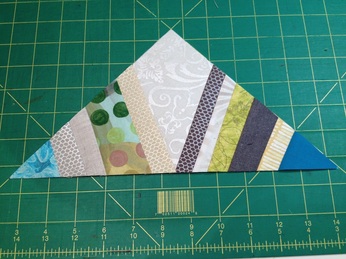
Directions and Cutting Create a trapezoid template out of graph paper or your favorite material. Cut one 8 1/2" square of template material. Cut the square in half diagonally (yielding 1 Isosceles triangle 8 1/2" x 12"). To make center trapezoid template measure and mark 2 1/2" down from top point of triangle. Mark center point on long edge of triangle. Mark 1/4 inch on each side of center mark. Draw line to connect the 1/4" center base mark to the 2 1/2" top of triangle mark. Cut along lines to create your trapezoid template. Shown in left photo above. Cut 8 ivory trapezoids from fat quarters of Shimmer. (It's Ok if they are not perfect. Adds to charm and note in antique quilt that star points are wonky) To make your blocks, cut four 8 1/2" squares of foundation paper. Cut each square in half diagonally (yielding 8 Isosceles triangles 8 1/2" x 12")
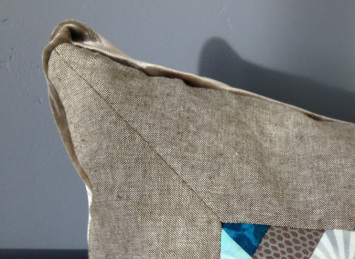
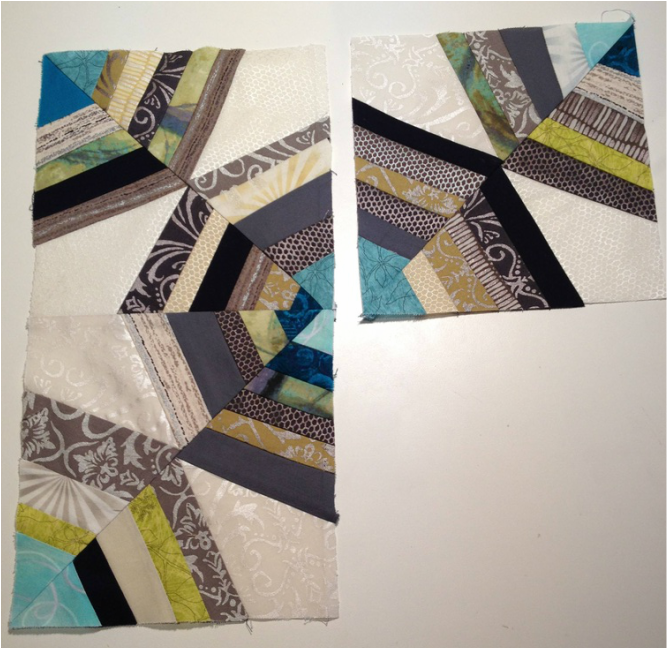 Assemble triangles together to create four squares. Assemble squares to one another as shown above and note that center of block is important to match so "turquoise gemstone" has center point. This is the only area in entire block that matters to match points. 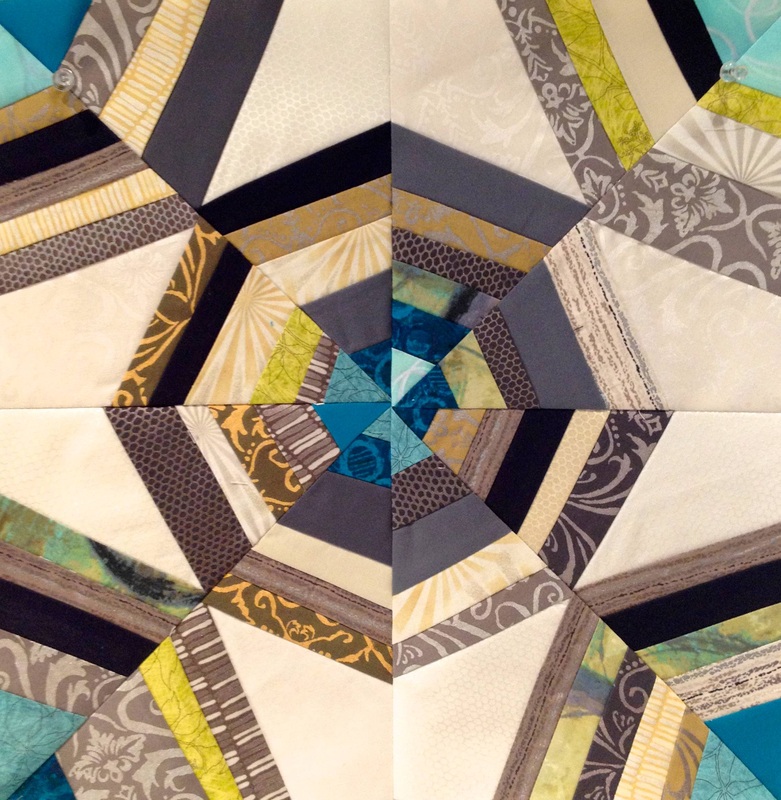 Above trimmed finished block measures 15 1/4" square.
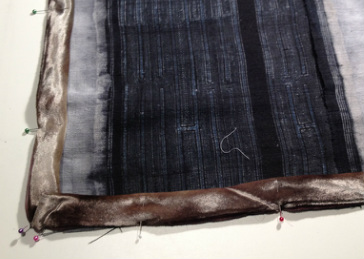
Double velvet trim and with raw edges together, machine baste onto back pillow square. Pin pillow top with right sides together. Sew in 22" zipper. See zipper tutorial for assistance. Add pillow insert, fluff, and you're done.
 Enjoy your sophisticated pillow and please refer to other blogs when needing more specifics on technique. My blog is more inspiration based than step-by-step technique. That wraps up the pillow section of Free Project Friday!! Day and Night and Fly pillows are posted on previous blog dates. Until Next Time, SHIMMER - It's in our Nature. 
6 Comments
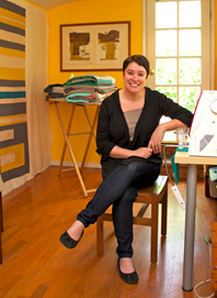
 Welcome to the SHIMMER BLOG HOP. Being a California convert myself, it was appropriate that a west coast group kicks off the SHIMMER BLOG HOP. For the second week, starting on April 7 we have - Amanda Jean Nyberg- Crazy Mom Quilts, April 8- Lee Heinrich- Freshly Pieced April 9- Cheryl Arkinson- Naptime Quilter April 10- Christina Cameli- A Few Scraps April 11- Elizabeth Hartman- Oh Fransson April 12- Faith Jones-Fresh Lemon Quilts April 13- Gemma Jackson- Pretty Bobbins We have a stellar list of 20 bloggers total (complete list below ), each with a SHIMMER prize to give away to their peeps. I hope you will follow along as I will be giving away a grand prize of the entire line of FQ SHIMMER on April 21! A little background on the talent: Janice Ryan and Julie Herman are the darlings of the "Let's get it done!" Marketing Department at Robert Kaufman Co (RKC). Last Fall, I went GA-GA over the noodlehead cargo bag Janice made and knew in an instant I wanted to work with her. The cargo bag in the SHIMMER lookbook is her work and I think a tiny war may ensue about who's keeping it! Check her out April 2nd.
 Wrapping up the first week is my beloved peeps at C&T Publishing and Stash Books. Not sure if you know this, but it's a family affair. My mother and father-in-law started C&T 35 years ago. My husband, Todd Hensley and his brother Tony and their amazing team continue the tradition of creating the best how-to quilt and sewing books in the world!! Sunday's post includes a wonderful story! Finally a big thanks to Teresa Coates at Robert Kaufman for helping me launch my first blog hop and all the people who said YES! I am looking forward to what they create and share with us.
As the blog hop moves along, please leave comments on my blog (sign up on my mailing list if you haven't already in order to enter) and the bloggers who are presenting. We'd love to hear what your favorites are along the way and if you are inspired to make a project. Go CREATE and SHIMMER!! xo  Super easy pillow project.These Dawn and Dusk Pillows are FUN TO MAKE- quick and gorgeous! Fabulous, stripped, big 25" square pillows from my look book have special exposed seam detail and minky backs! They came together so quickly because I used easy to find items such as precut SHIMMER rollups and standard 26" euro pillow forms. This is my kind of project. I love making great impact pillows in a day. You too? And they are so functional for the whole family! Beginner project? YES! Stylish? FOR SURE! Sewist by day, pillow lounger/movie junkie by night? Bliss!! Funny thing is, on the back side I used plush minky and that of course, is the side my kids LOVE… Which frankly is the best solution ever…my fancy side stays fairly clean!   We start with a standard 2.5 inch precut rollup. 2 inch-wide cut-off selvages from Essex YD linen. Two (26 inch) euro pillow forms, 3/4 yards of minky and two (22 inch) zippers. Isn't this rollup yummy? I, like many of you, have a hard time unwrapping things so lovely as a brand new, perfectly coordinated rollup. But commit we must. Yes, as soon as I pop that tight brown belt and unroll the disc, a bittersweet flash washes over me. Hello my name is Octopus. The great thing is that you can just start sewing. But I suggest you spend a little time organizing the lights separately from the darks, hence my pillow names Dawn, which is all light colors and Dusk, which is the darks. This group easily separates down the middle value wise with even amount of fabric in each story. At that point, your are ready to sit at the machine. 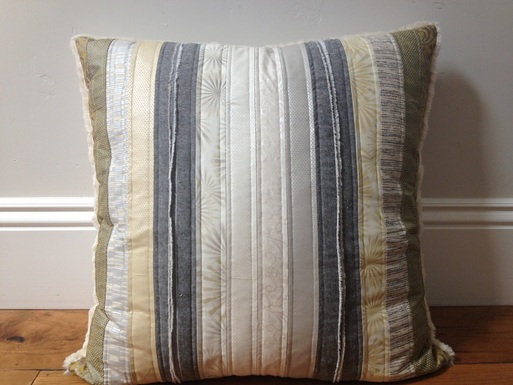 Dawn Pillow Dawn Pillow Let's start with the Dawn pillow. The instructions are the same for the Dusk pillow except you are using the darkest colors instead. 1. First, I sewed the lightest strips WOF together in a group of 4. As you see (right), my lightest, cleanest whites are in the center of the pillow. This creates the shimmer/glow effect of the pillow design. 2. Collect your medium-lights and sew two sets of 4 strips together. I chose to put the vintage lichen colored prints on the outside and use them as book ends. (below detail) 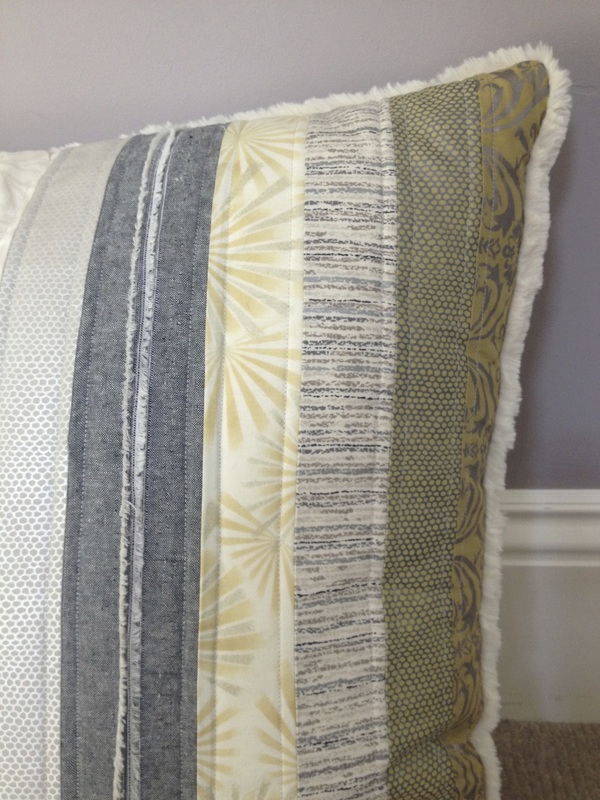 3. At this point I needed a little zip in my project. It bored me to do just a striped, stripped light pillow so I dug into my Essex Linen box looking for texture and variety. As usual, I was admiring the interesting selvages and then a light bulb went off! Exposed seams are so GREAT! I want to highlight them! Immediately, I whacked off the selvages measuring 2" strips (this was the only cutting I did thus far!) and sewed them together with a 1/2-inch seam allowance to beef up "the fringe" (there are no right sides when sewing together with yarn dyes). Now I have my "exposed selvage strip" that gave my pillow that great designer look. 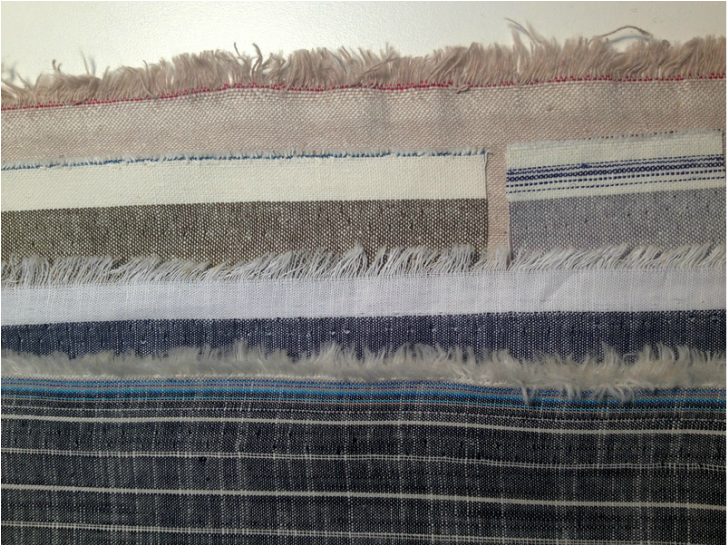 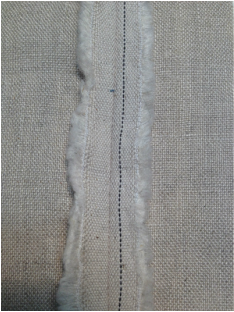 Here is a detail of the seamed strip (right) after a light pressing. Also, a nice touch design-wise, is when both pieces are sewn together the result is a 1/2" wider strip (2.5" finished). The textured linen inserted between the cotton SHIMMER pieces gives important, visual texture and balances the symmetrical design. For the Dawn pillow, I needed a touch of drama so I chose the Black Essex YD as the accent and the Flax Essex YD for the Dusk pillow. See below how each pillow has spark because of the value change? This is very important to do. Don't neglect to add this accent. This is key to creating a pillow that states "designer" vs. a pillow that looks "home made". I like the things in my nest to be special, functional and have beautiful detail. It is a mindful practice I really enjoy, especially in it's simplest form. These details provide visual poetry. I know, I know...I am a design geek. And if you're nodding your head, then may be you are too :). Welcome to my tribe. 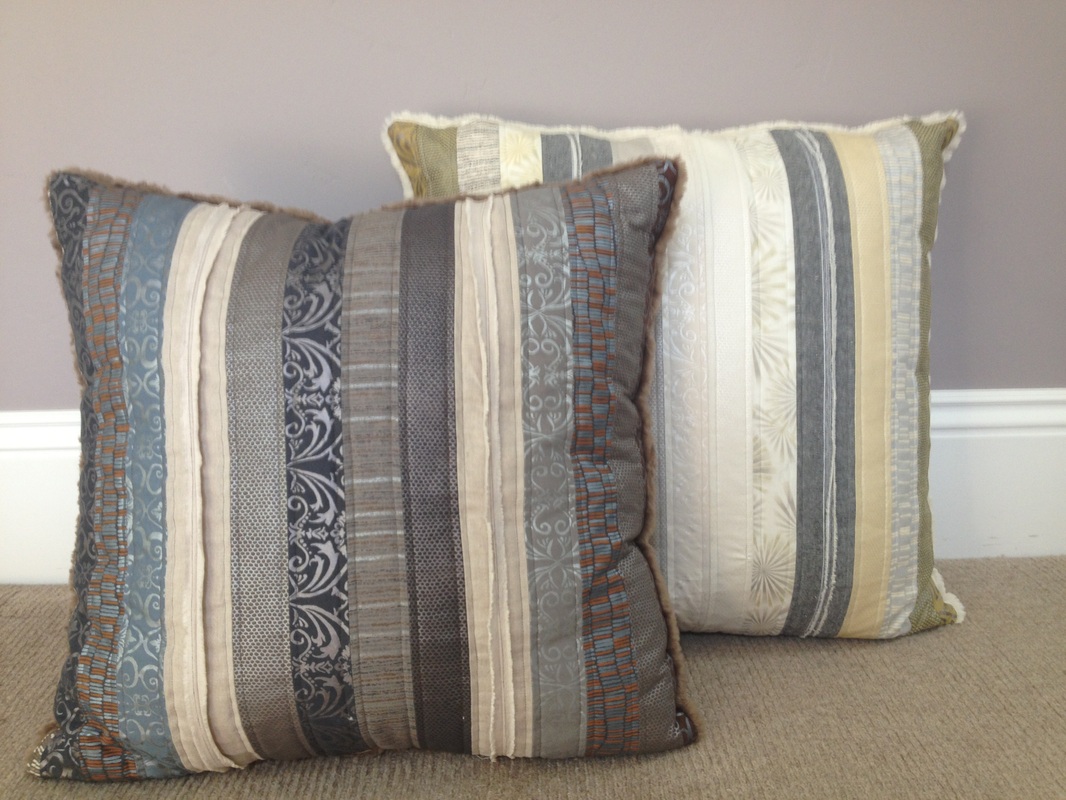 4. Once the strips are sewn together, trim square to 25 x 25 inches. Then press and add a lightest weight cotton batt on back and quilt straight lines about 1/4 of an inch on each side of seam. Next, cut the minky at 25 x 25 for the back of your pillow. I used creme for dawn and cafe for dusk. Follow this very clear and excellent zipper tutorial if you aren't familiar with putting zippers in pillows. 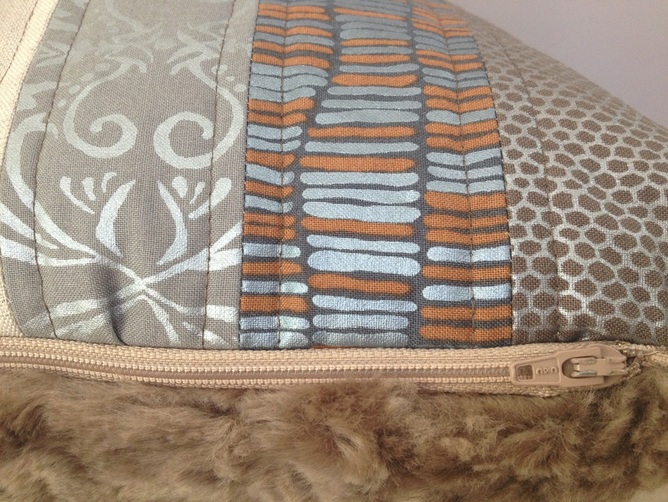 Now the SUPER EASY "LOOK WHAT I MADE" Part: add the insert!!! YAY! Good job!! Note that inserts should always be an inch larger than the cut fabric. The reason is to keep the pillow looking plump and full. Baggy pillows look sad, especially after a few uses. 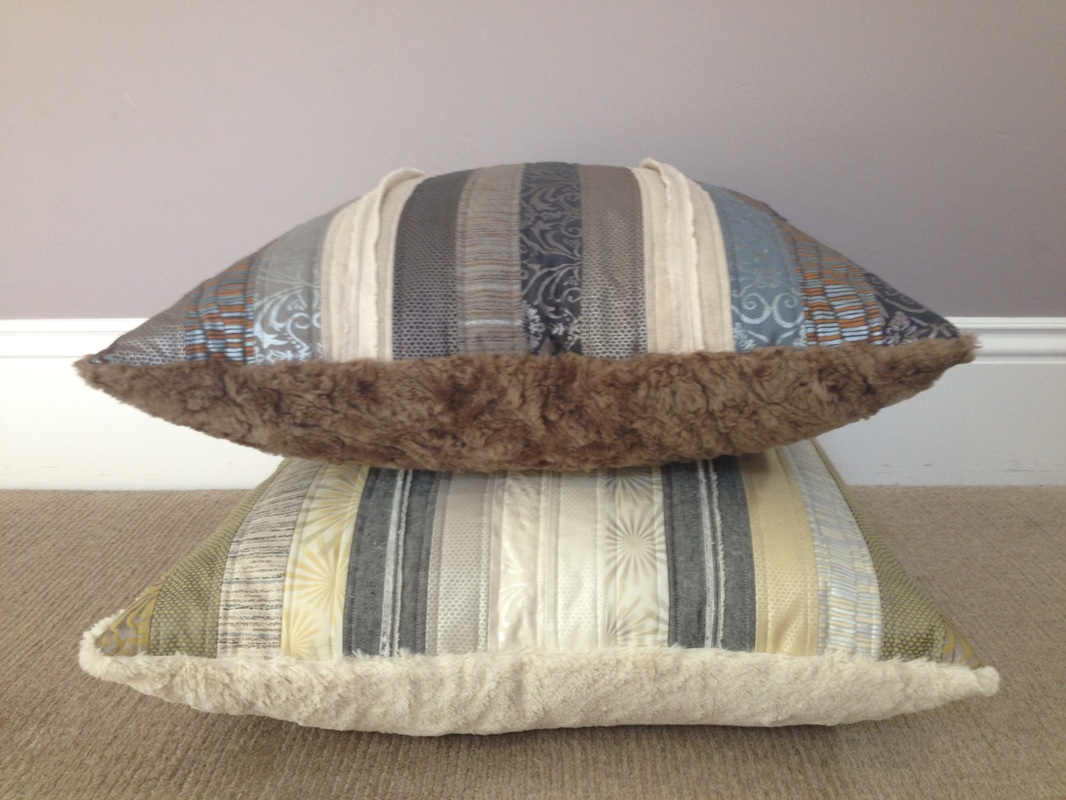 •nice, plump, plush, shimmery, designer pillows• Who's making the popcorn? Ever wonder how roll ups are made?Behind the scenes at Robert Kaufman Company. 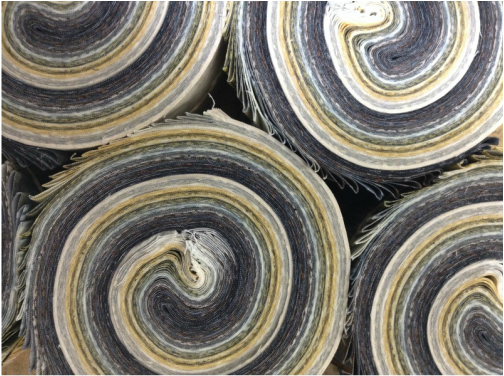 Teresa Coates shot this footage for me and I LOVE IT!!!! Check out the video of a roll up being made. It's so NEAT! •"Hello World, my name is Rollup"• 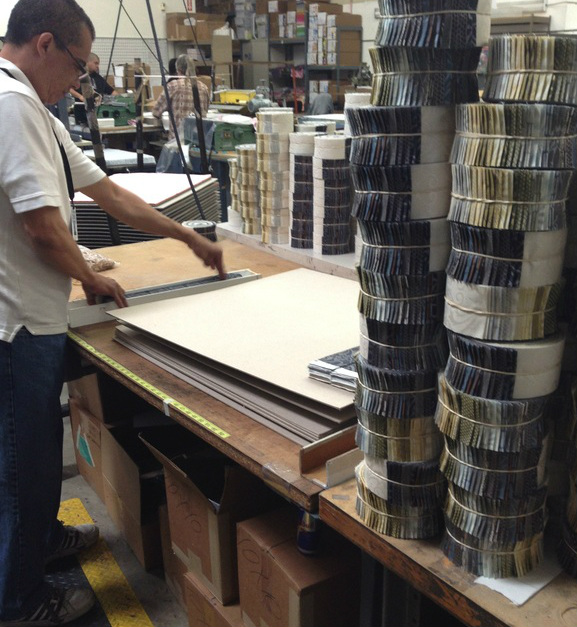 And now for the grand announcement BLOG HOP COMMENCES APRIL 1 LOOK AT THIS LIST OF AWESOME WOMEN- AND FOLLOW ALONG! …I LOVE these women for saying YES and being so crafty cool...
Thanks for stopping by. I enjoy casual blogging immensely. This, by far, was my longest post ever because it was the first time I have talked about making a project. I hope I was clear (enough) and I do rely on others by creating links to those who are thorough at teaching technique. I have great respect for them. My focus is on inspiration and design. I will do my best to steer you to other fine bloggers and tutorials for specific things that I do not offer. Until next time, Shimmer- it's in our nature!  I have a friend named Shea. She's a nature girl. She loves gardening, tending her chickens, playing in the creek near her house and loves anything the color of the forest, water or sky.  So when I asked her what colors I should use for a quilt I was planning for her new updated room (She’s 10 now.... double digits are impressive!) naturally, she said, “I would like it to be greens, teals and blues”. “Good enough!” I said. Pulling the right combination of fabrics from Studio Stash was easy as there are 17 colors that fall into that color category and I would have no problem creating a quilt that reflected her. Within a few minutes after picking up my colored pencils, I had a quick thumbnail sketch of a big zig zag quilt.  As I started laying out the fabrics, I was tempted to add a pink stripe for a bit of “pop” — after all, it’s one of my favorite colors. She squished up her face when I mentioned this...but no words, just a face followed by a darling toothy smile. In the end, after chatting with her mom (my best friend) I decided to add just a touch of pink in the bottom right corner....Which is my way of tugging her little ear, and whispering to her, “Goodnight my child, sweet dreams” and maybe one day she will like pink too..... 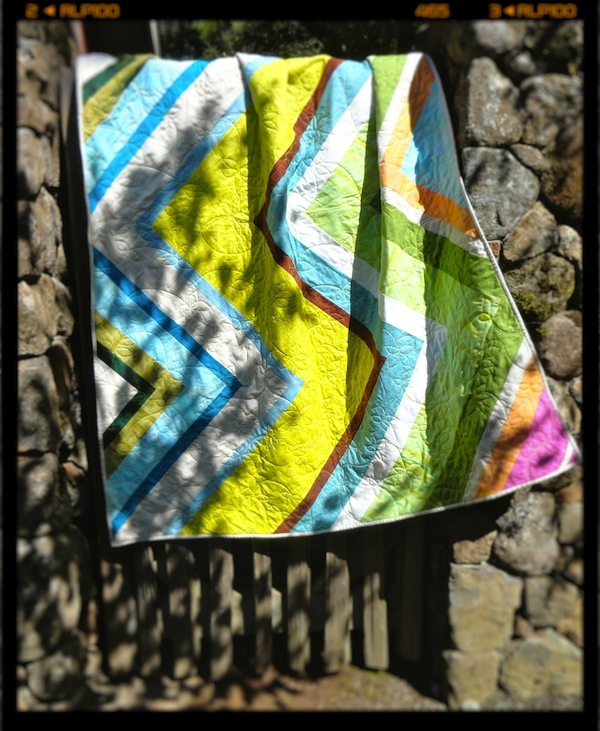 You can download this pattern for FREE at PatternSpot.com or Robert Kaufman Co. Thank you Robert Kaufman for providing the pattern. Quilt was pieced by Debbie Slack and quilted by Jocelyn Marzan. 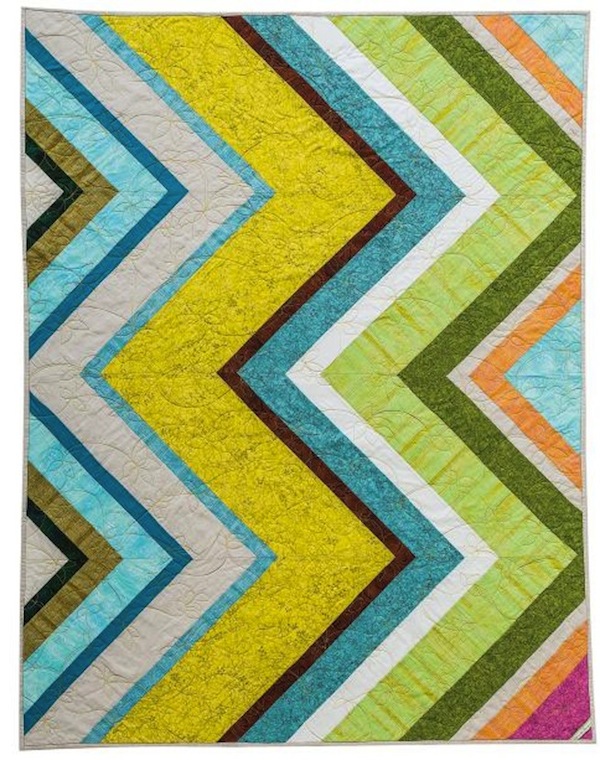 Now for the Giveaway!Jennifer Sampou is showcasing her wonderful new fabric collection, Studio Stash. Enter to win up to 4 fat packs ($30 value each) by joining her email list (bottom of page). Drawing ends August 31, 2013. All existing subscribers are eligible. Don’t worry, Jennifer doesn’t share her list with anyone else.  |

Jennifer SampouStories from the Studio My Patterns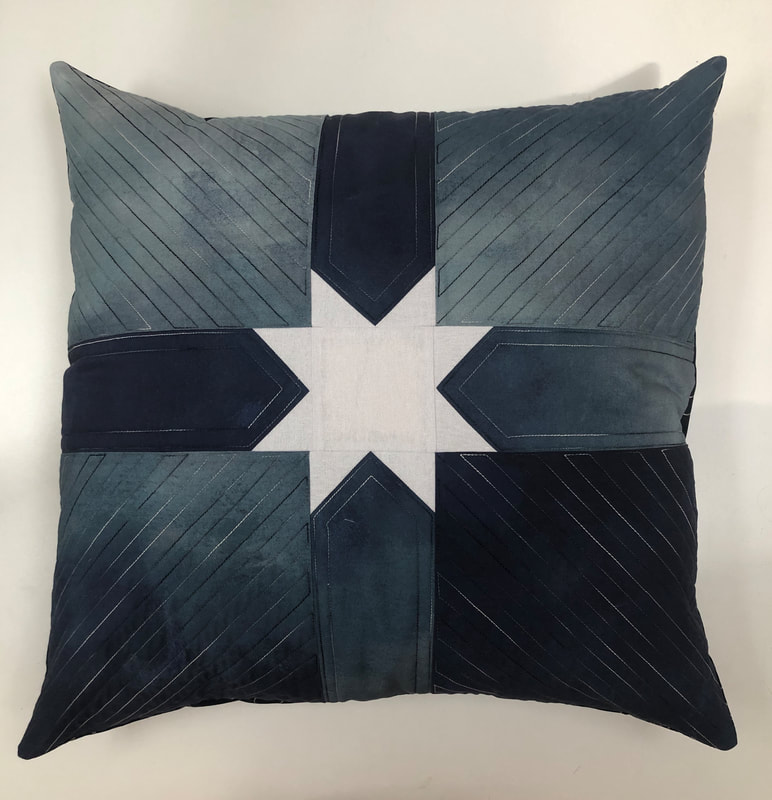
Free Pattern and Interview The Quilt Show #2706
with Alex Anderson.


Subscribe to my YouTube ChannelCategories
All
Past Entries
April 2024
|

- Home
- Store
- Learning
- Going Green
-
Fabric Library
- SKY
- Chalk & Charcoal Basics
- Chalk & Charcoal
- Spring Shimmer
- Winter Shimmer
- Winter Shimmer 2
- Shimmer On
- black&white 2
- Studio Stash 3 Cool Story prints and yarn dyes
- Studio Stash 3 Warm Story prints and yarn dyes
- Shimmer 2014
- Shimmer II - 2015
- black&white 2015
- Studio Stash II - 2014
- color:FULL 2014
- Studio Stash Yarn Dyes 2014
- Daisy Love Flannel Collection 2014
- Studio Stash Fabric Collection 2013
- Continuum Fabric Collection 2012
- Fiesta Collection 2011
- About
- My Blog
- Newsletter Sign Up

 RSS Feed
|
Have a Question? Email us at [email protected]
Links I Love©1990-2024 Jennifer Sampou. All Rights Reserved.
|
|