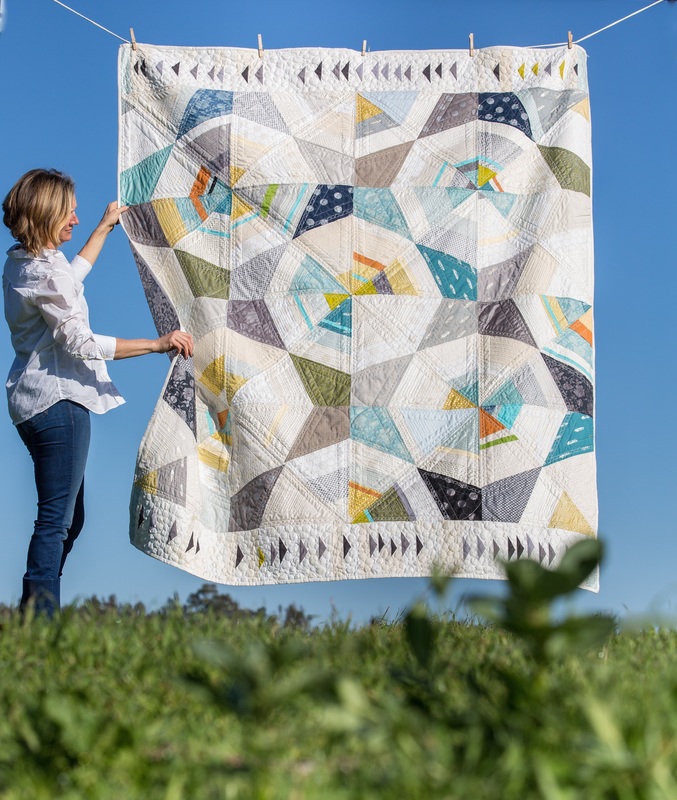
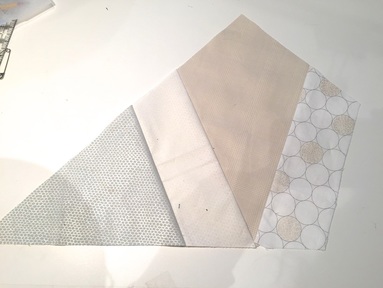
 It was really fun to design and make this quilt. Lots of thought went into getting pattern and color placement just right. Today, I have a few Octagon Shimmer Pattern and all the stuff that you need to make one so I am excited to share it with you. I have been eyeing all things spiderweb-ish for a few seasons now: From nature walks through tall, wet grass observing tiny webby worlds nestled peacefully (before my lumbering chocolate labs wanna see too, obliterating it only to slobber my face) to 3am insomnia searches on Pinterest for spider web designs.... I adore octies, BIG SCALE and this curated color vibe I live with in my home. Here is the culmination of all those ideas. 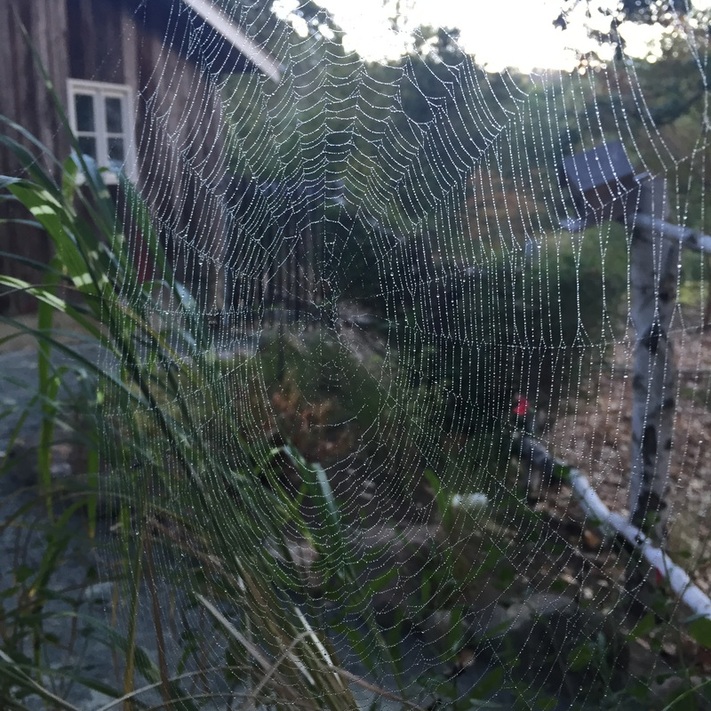 TIPS ON MAKING THIS QUILT. The new pattern I created for C&T Publishing, tells you "how to" very clearly with lots of tips included. This blog offers a bit more detailed information on color and value choices and tips I like to call "a few secrets revealed" :) if you care to read on. I am visual learner....so as usual it is loaded with images.  Color palette includes the entire Shimmer 2 Collection, a few Kona solids and my Studio Stash Yarn dyes. Having one each of the FQ towers: Shimmer 2 and Shimmer 2 Coordinates will give you what you need for octagons. 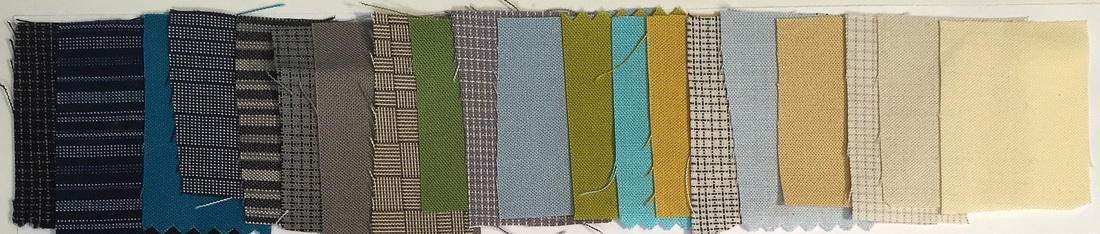 Next step is to start cutting. You will be using every piece of fabric in Octagon Shimmer Quilt.
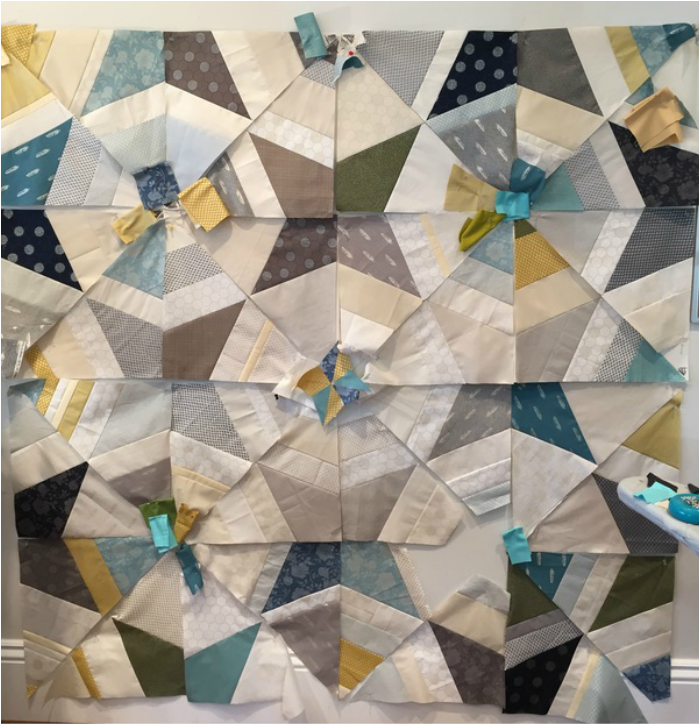 C. Adding POP Kona bias and piecing triangles into finished octagons. Decide on final set of your blocks and then add pop KONA colored home made bias tape. More detail in pattern. SECRET #4- When in doubt take it out! Restraint is important during this step. I had originally overdone the color pops but the good thing is that they were pinned, not sewn on. Step back. Walk out of the room. Sleep on it....What I learned is that taking about 40% of the color OFF the block gave me the final look I was striving for. Loving the old adage, Less is More. 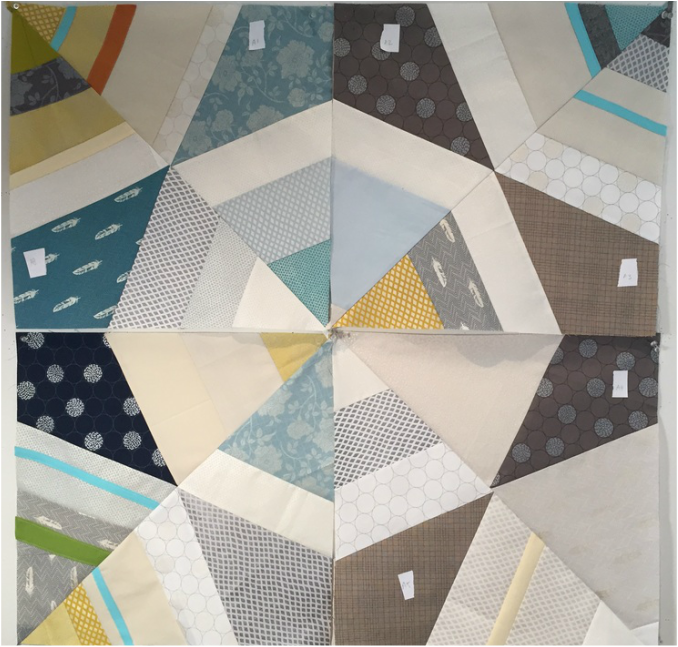 D. Borders: Icing on the cake. The pattern instructions call for WOF yardage to create the wonky flying geese. Labor intensive little blocks but totally worth it. Easier to strip piece WOF with my method than using FQ. That is why My kit for sale includes yardage of whites for this purpose in addition to the two FQ towers for octagon blocks (14 1/4 yds total in kit) You will have great scraps left over to do something fun on the back. 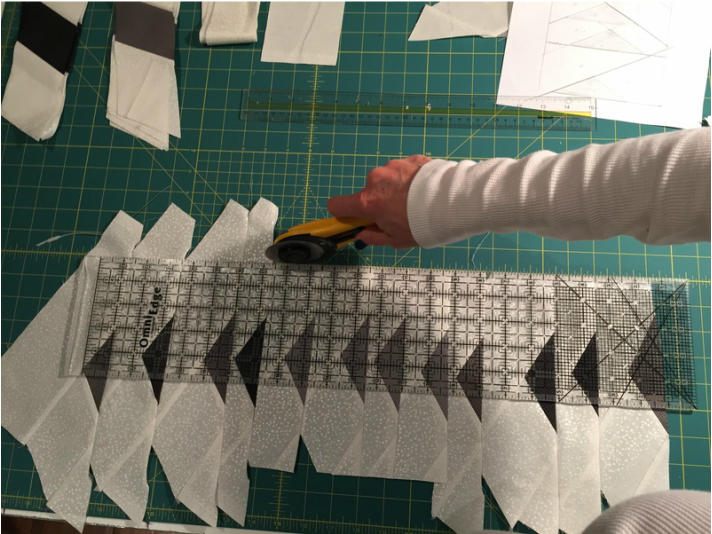 These are the main design considerations and observations that are important to understand if you want to create a similar feeling to what I have made. Yet, as always, I welcome new ideas, new approaches and hope you will share your own creations and show me how you see it. You can find me on Facebook or Instagram and of course always email my website too. Whether you pull together your own selection of fabrics or are supporting your local store (good job!), at least you have this inside look of what was swirling around in my head as the quilt evolved. I hope you enjoy your sewing every time you sit down to create. Create and Shimmer on!! 
13 Comments
|

Jennifer SampouStories from the Studio My Patterns
Free Pattern and Interview The Quilt Show #2706
with Alex Anderson.


Subscribe to my YouTube ChannelCategories
All
Past Entries
April 2024
|

- Home
- Store
- Learning
- Going Green
-
Fabric Library
- SKY
- Chalk & Charcoal Basics
- Chalk & Charcoal
- Spring Shimmer
- Winter Shimmer
- Winter Shimmer 2
- Shimmer On
- black&white 2
- Studio Stash 3 Cool Story prints and yarn dyes
- Studio Stash 3 Warm Story prints and yarn dyes
- Shimmer 2014
- Shimmer II - 2015
- black&white 2015
- Studio Stash II - 2014
- color:FULL 2014
- Studio Stash Yarn Dyes 2014
- Daisy Love Flannel Collection 2014
- Studio Stash Fabric Collection 2013
- Continuum Fabric Collection 2012
- Fiesta Collection 2011
- About
- My Blog
- Newsletter Sign Up
 RSS Feed
|
Have a Question? Email us at [email protected]
Links I Love©1990-2024 Jennifer Sampou. All Rights Reserved.
|
|